Introduction
Sound sensor is a component that receives sound waves and converts them into electrical signal. It detects the sound intensity in ambient environment like a microphone.
Required Components
– 1 * Raspberry Pi
– 1 * Breadboard
– 1 * PCF8591
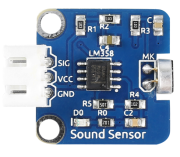
– 1 * Sound sensor module
– 1 * 3-Pin anti-reverse cable
– Several Jumper wires
Experimental Principle
The microphone on the sensor module can convert audio signals into electrical signals (analog quantity), then convert analog quantity into digital quantity by PCF8591 and transfer them to MCU.
LM358 is a dual-channel operational amplifier. It contains two independent, high gain, and internally compensated amplifiers, but we will only use one of them in this experiment. The microphone transforms sound signals into electrical signals and then sends out the signals to pin 2 of LM358 and outputs them to pin 1 (that’s, pin SIG of the module) via the external circuit. Then use PCF8591 to read analog values.
PCF8591 is an 8-bit resolution, 4-channel A/D,1-channel D/A conversion chip. We connect the output terminal (SIG) to AIN0 of PCF8591 so as to detect the strength of voice signal in a real-time manner.
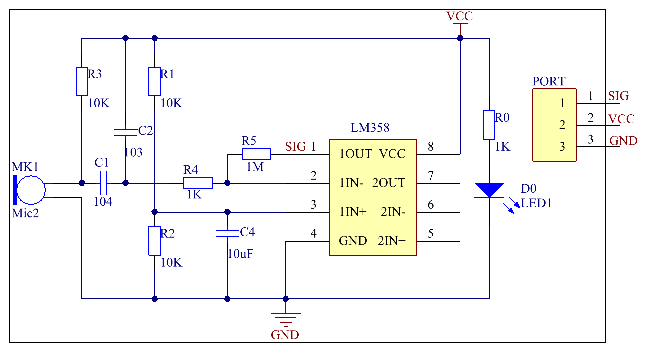
The schematic diagram of the module is as shown below:
Experimental Procedures
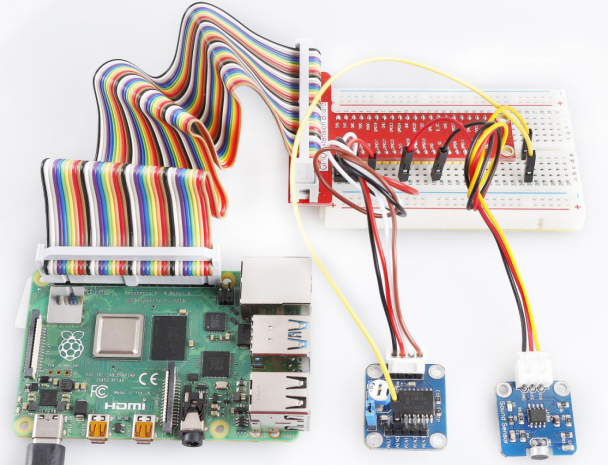
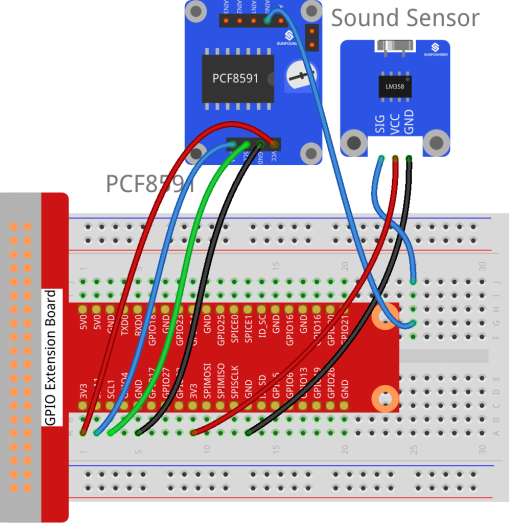
Step 1: Build the circuit according to the following method.
| Raspberry Pi | GPIO Extension Board | PCF8591 Module |
| SDA | SDA1 | SDA |
| SCL | SCL1 | SCL |
| 3.3V | 3V3 | VCC |
| GND | GND | GND |
| Sound Sensor Module | GPIO Extension Board | PCF8591 Module |
| SIG | * | AIN0 |
| VCC | 3V3 | VCC |
| GND | GND | GND |
For C Users:
Step 2: Change directory.
cd /home/pi/SunFounder_SensorKit_for_RPi2/C/19_sound_sensor/Step 3: Compile.
gcc sound_sensor.c -lwiringPi Step 4: Run.
sudo ./a.outFor Python Users:
Step 2: Change directory.
cd /home/pi/SunFounder_SensorKit_for_RPi2/Python/Step 3: Run.
sudo python3 19_sound_sensor.pyNow, speak close to or blow to the microphone, and you can see “Voice In!! ***” printed on the screen.